Flaky Apple Galette: Master the Crust with Puff Pastry Tips
Imagine a dessert that carries the rustic charm of a country bakery with the elegance of a French patisserie, yet is surprisingly simple to create in your own kitchen. That, my friends, is the magic of the
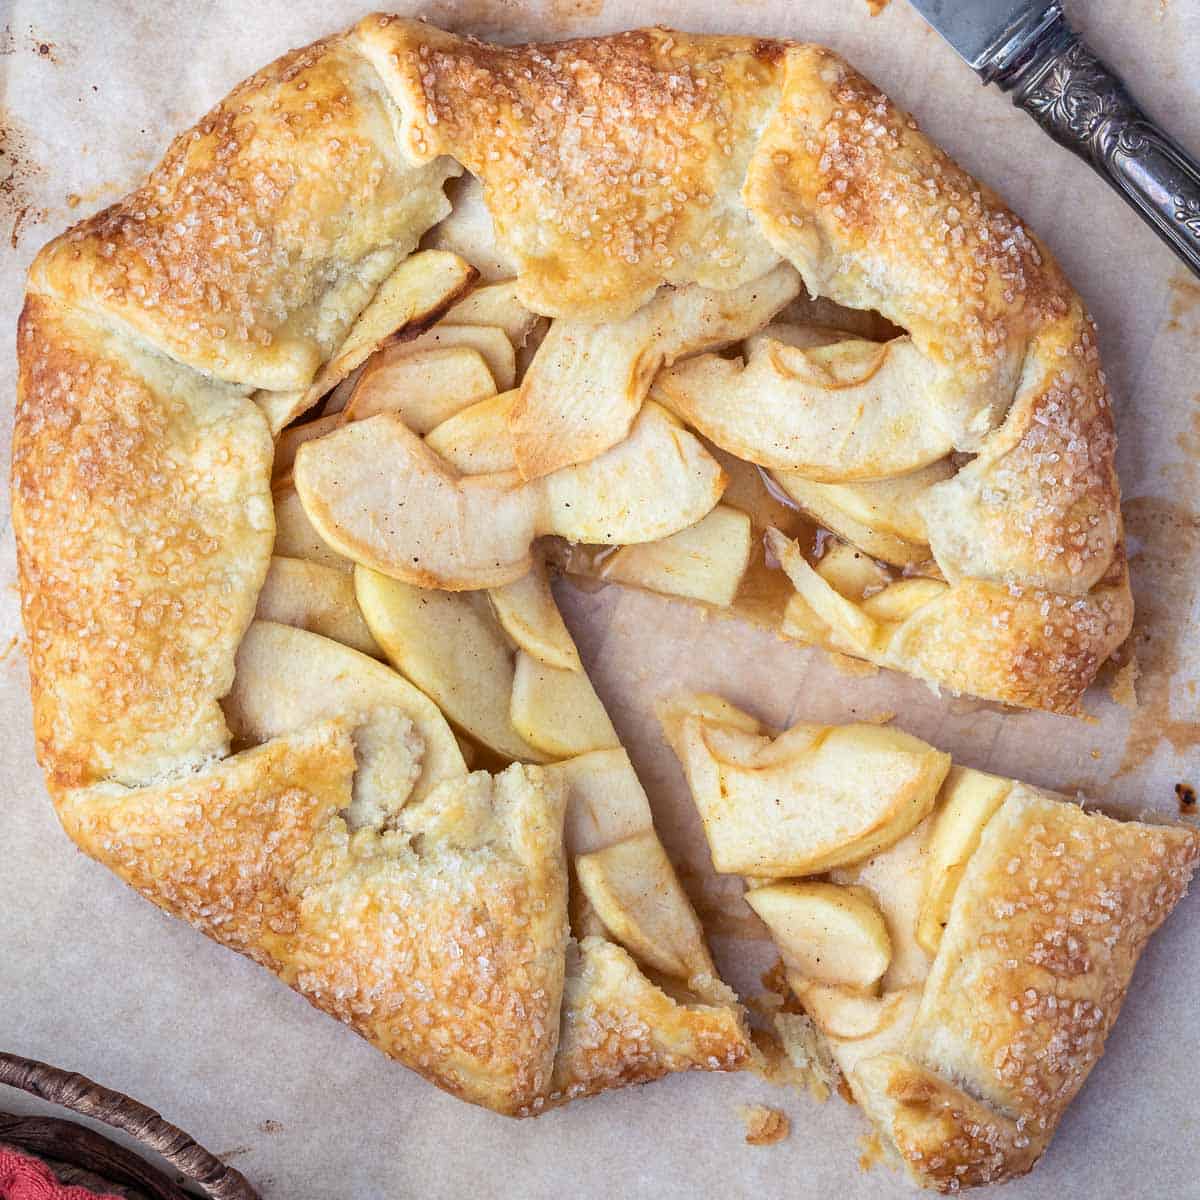
apple galette. Often hailed as the simpler, more approachable cousin to the classic apple pie, this free-form tart delivers all the warm, spiced, fruity goodness with significantly less fuss. Perfect for both novice bakers and seasoned pros looking for a quick yet impressive dessert, the apple galette is a true crowd-pleaser, ideal for any occasion from a casual weeknight treat to a festive holiday gathering.
What sets an outstanding apple galette apart? It’s undeniably the crust. While many recipes might call for homemade pie dough, we're going to unlock the secret to an effortlessly flaky, golden crust using a humble, store-bought hero: puff pastry. This article will guide you through mastering the art of the apple galette, focusing on essential tips for creating that perfect, buttery, shatteringly crisp base that truly elevates this rustic dessert. For more insights into this delightful creation, explore our guide on
Easy Apple Galette: The Simple, Rustic Alternative to Pie.
The Secret Weapon: Store-Bought Puff Pastry for a Perfect Crust
The allure of the apple galette lies in its rustic, unpretentious appearance, and nothing achieves that coveted flaky texture with minimal effort quite like quality store-bought puff pastry. Forget the hours of chilling, folding, and rolling required for traditional pie dough; puff pastry does most of the heavy lifting for you. This pre-made wonder, with its hundreds of delicate layers of butter and dough, guarantees a beautiful rise and an irresistibly crisp bite every time.
But not all puff pastry is created equal. For the best results, seek out brands that use
real butter as their primary fat. Many commercial puff pastries use hydrogenated oils, which, while functional, simply don't deliver the same depth of flavor or delicate flakiness that butter provides. Real butter puff pastry will yield a more golden hue and a richer taste, truly enhancing your galette.
Tips for Handling Puff Pastry:
*
Keep it Cold: Puff pastry is temperamental. Its layers of butter need to stay cold to prevent melting and ensure maximum puff. Remove it from the refrigerator just before you're ready to roll. If your kitchen is particularly warm, consider chilling your work surface by placing ice packs on it for a few minutes beforehand.
*
Lightly Flour: Lightly flour your work surface, the dough itself, and your rolling pin to prevent sticking. However, use flour sparingly; too much can make the pastry tough.
*
Roll Gently and Evenly: Roll the pastry sheet to about ⅛-inch thickness. Apply even pressure, working from the center outwards, turning the dough occasionally to ensure a consistent round shape. Avoid stretching or tearing the dough, as this can compromise its flaky layers.
*
Work Quickly: The less time the pastry spends at room temperature, the better its texture will be. If it starts to feel too soft, pop it back into the fridge for 10-15 minutes to firm up.
By treating your puff pastry with a little care, you'll be rewarded with a crust that's not just easy, but truly spectacular – golden, buttery, and incredibly flaky.
Crafting the Perfectly Spiced Apple Filling
While the crust sets the stage, the apple filling is the star of your galette. A well-balanced filling combines tender-crisp apples with aromatic spices and just the right amount of sweetness.
Choosing Your Apples: The Key to Texture
The success of your apple filling hinges significantly on your choice of apples. For baking, you want varieties that hold their shape and texture without turning into mush. Excellent choices include:
*
Idared
*
Cortland
*
Spartan
*
Honeycrisp
*
Granny Smith (often mixed with sweeter apples for balance)
Avoid apples like Red Delicious, which become mealy and flavorless when baked. The ideal baking apple will remain somewhat crisp after baking, providing a delightful textural contrast to the soft, spiced interior.
Preparation and Flavor Blend:
Start by peeling, coring, and slicing your chosen apples into roughly ⅓-inch thick pieces. This thickness ensures even cooking and prevents them from becoming too soft. In a large bowl, toss the apple slices with a tablespoon of freshly squeezed lemon juice. The lemon juice isn't just for flavor; it also brightens the apples and prevents them from browning.
Next, combine your dry ingredients: superfine sugar, cornstarch, ground cinnamon, ground nutmeg, and a hint of ground cloves. The cornstarch acts as a thickener, ensuring your filling isn't too watery, while the sugar provides sweetness. This classic spice blend evokes warmth and comfort, perfectly complementing the apples. Toss the spiced sugar mixture with the lemon-coated apples until every slice is evenly coated. This ensures a consistent flavor profile throughout your galette.
Assembling and Baking Your Flaky Masterpiece
Now that your crust is prepped and your filling is ready, it's time to bring your apple galette to life. The beauty of this dessert lies in its forgiving, rustic nature – no need for perfection!
Step-by-Step Assembly:
1.
Preheat and Prepare: Preheat your oven to 400 degrees F (200 degrees C). Lay your rolled puff pastry sheet onto a round pizza pan or a baking sheet lined with parchment paper. A pizza pan offers a convenient round base for shaping.
2.
Arrange the Apples: Spread the apple mixture evenly into the center of the puff pastry, leaving a generous 2-inch border around the edges.
3.
Fold the Edges: Gently fold the edges of the pastry inward over the apples, creating a rustic border. Don't worry about making it perfectly symmetrical; the charm of a galette is its free-form, imperfect beauty.
4.
Egg Wash (First Pass): In a small bowl, lightly beat one egg. Brush about half of the beaten egg over the folded pastry edges. This egg wash contributes to the golden-brown color and shine of the crust.
5.
Chill for Flavor and Firmness: Refrigerate the assembled galette for about 10 minutes. This crucial step allows the pastry to firm up, helps prevent shrinkage during baking, and allows the flavors of the filling to meld.
6.
Egg Wash (Second Pass): After chilling, brush the remaining half of the beaten egg over the pastry edges.
Baking for Perfection:
1.
Initial High Heat: Place the pan on the top rack of your preheated oven and bake for 20 minutes. The initial high heat helps the puff pastry to rise quickly and set its layers, creating that desirable flakiness.
2.
Lower Heat for Even Browning: After 20 minutes, give the galette a quarter turn to encourage even browning and lower the oven temperature to 350 degrees F (175 degrees C). Continue baking for another 8 to 10 minutes, or until the pastry is beautifully golden brown and the apples are tender.
3.
Cool Slightly: Once baked, remove the galette from the oven and let it cool slightly on the pan for about 10 minutes before serving. This cooling time allows the filling to set properly, preventing it from spilling out when sliced.
Beyond the Basics: Customization & Serving Suggestions
One of the joys of baking an apple galette is its incredible versatility. While delicious on its own, you can easily customize the flavors to suit your palate or whatever ingredients you have on hand. For even more creative ideas, check out our comprehensive guide:
Homemade Apple Galette: Delicious Recipe & Custom Flavor Ideas.
Flavor Enhancements:
*
Sweet Additions: Consider folding in a handful of raisins, dried cranberries, or chopped dates with your apple mixture for extra bursts of sweetness and chewiness.
*
Nutty Crunch: A sprinkle of slivered almonds or chopped walnuts over the apples before folding the crust adds a delightful crunch and nutty flavor.
*
Citrus Zest: A touch of orange or lemon zest mixed with the spices can brighten the entire flavor profile.
*
Spiced Variations: Experiment with a pinch of ground ginger, cardamom, or even a touch of black pepper for an unexpected kick.
*
Turbinado Sparkle: For an extra-crunchy, shimmering crust, sprinkle a tablespoon of turbinado sugar over the egg-washed pastry edges just before baking.
Serving Your Galette:
The quintessential way to enjoy a warm apple galette is with a generous scoop of good quality vanilla ice cream. The cold, creamy ice cream melting over the warm, spiced apples and flaky crust is an unparalleled sensory experience. Other delightful accompaniments include a dollop of fresh whipped cream, a drizzle of warm caramel sauce, or a light dusting of powdered sugar.
Whether served as a rustic dessert for a family dinner or as an impressive centerpiece for a holiday spread, your homemade apple galette is sure to earn rave reviews.
Conclusion
The apple galette stands as a testament to the idea that some of the most impressive desserts are also the simplest to create. By embracing the convenience and quality of store-bought puff pastry, you can effortlessly achieve a magnificent, flaky crust that perfectly cradles a tender, spiced apple filling. From selecting the right apples to applying that perfect egg wash, every step contributes to a dessert that is both visually appealing and incredibly satisfying. So, next time you're craving a comforting, elegant treat without the fuss of a traditional pie, turn to the humble yet extraordinary apple galette. It's a culinary journey that promises a golden crust, a warm embrace of flavors, and the sweet satisfaction of baking something truly wonderful.